
How To Create FTP Account In Windows Server 2008 R2 (Microsoft FTP Service 7.5)?
Requirements
Windows Server 2008 R2 comes with FTP Publishing Service 7.5. This new FTP service offers Web administrators and hosters an integrated management and configuration experience for FTP and Web sites through IIS Manager.This step by step guide to show you how to create an FTP account in Windows Server 2008 R2.
Step By Step Guide
1) Create FTP Username
Open Start > Administrative Tools > Server Manager and go to Server Manager > Configuration > Local Users and Groups > Users. Create a new Windows user account that you want to use as FTP username. Usually you can use your domain name.
2) Create FTP Site
2.a Open Start > Administrative Tools >Internet Information Service (IIS) Manager and go to Sites > yoursite.com. Click "Add FTP Publising..." link in the right bottom corner.
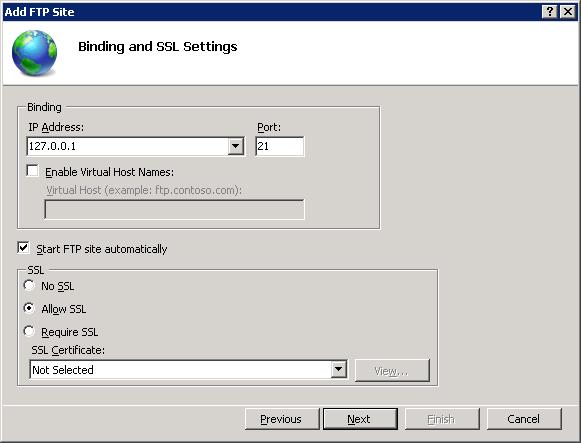
2.b Make sure that the Certificates drop-down is set to "Not Selected" and that the Allow SSL option is selected.

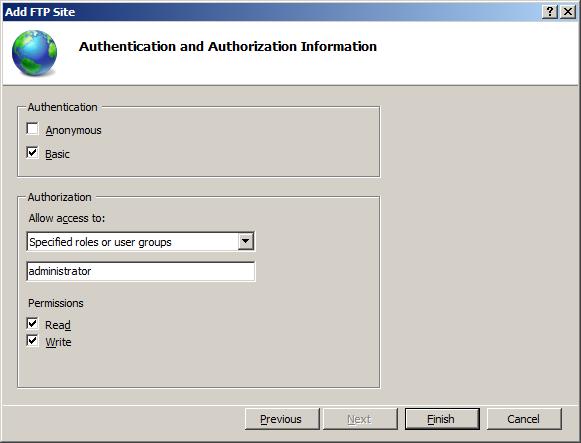
2.c Select Basic for the Authentication settings. Choose "Specified users" from the Allow access to drop-down and type the username just created. Select Read and Write for the Permissions option.

2.d You have successfully added FTP publishing to an existing Web site. You can also change the physical path for the FTP Account. Click "Advanced Settings..." link in the right bottom corner. Change the physical path from "C:\Domains\sqlserverhost.net\wwwroot" to "C:\Domains\sqlserverhost.net". So you can access upper level folder.

Reference link:- http://www.winservermart.com/HowTo/Create_FTP_Account_In_Windows_2008_R2.aspx
Adding FTP Publishing Using the IIS Manager
The new FTP service makes it easy to add FTP publishing to existing sites by providing you with a wizard that walks you through all of the required steps.Step 1: Use the FTP Site Wizard to add FTP publishing
In this first step, add FTP publishing to the Default Web site, and add the require settings to allow the local administrator account to edit the content.- In IIS Manager, in the Connections pane, expand the Sites node in the tree, then click the Default Web Site.
- As shown in the image below, click Add FTP Publishing in the Actions pane.
- When the Add FTP Site wizard appears:
- Choose an IP address for your FTP site from the IP Address drop-down, or choose to accept the default selection of "All Unassigned." Because we use the administrator later in this walk-through, you want to ensure that you restrict access to the server and enter the local loopback IP address for your computer by typing "127.0.0.1" in the IP Address box.
- Normally, you would enter the TCP/IP port for the FTP site in the Port box. For this walk-through, choose to accept the default port of 21.
- For this walk- through, we will not use a host name, so make sure that the Virtual Host box is blank.
- Make sure that the Certificates drop-down is set to "Not Selected" and that the Allow SSL option is selected.
- When you have completed these items, click Next.
- On the next page of the wizard:
- Select Basic for the Authentication settings.
- For the Authorization settings:
- Choose "Specified users" from the Allow access to drop-down
- Type "administrator" for the user name.
- Select Read and Write for the Permissions option.
- When you have completed these items, click Finish.

Reference link:-http://www.iis.net/learn/publish/using-the-ftp-service/adding-ftp-publishing-to-a-web-site-in-iis-7
0 comments:
Post a Comment